Note that our Syntax also supports date math calculations. See more in the Syntax section.


Configuration
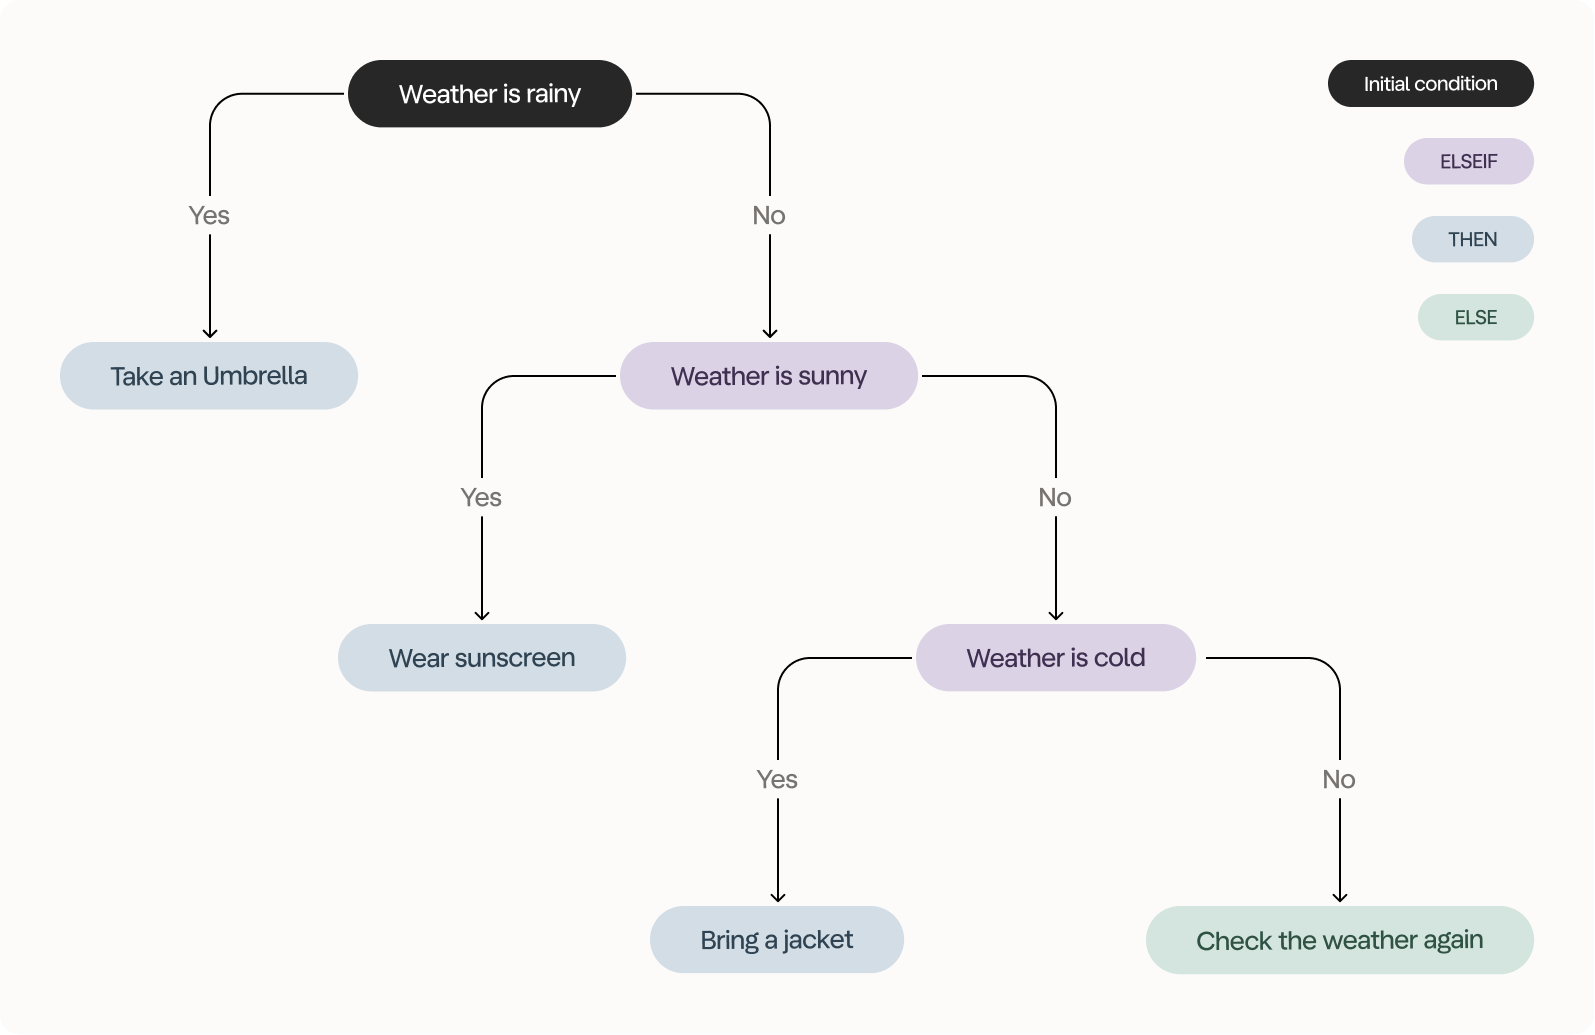
Your conditions are evaluated in the order you create them. In other words, if a cell value is equal to
Hello World and your first condition is IF [column].LEFT(5)="Hello" THEN "Something" and your second condition is IF [column].RIGHT(5)="World" THEN "SomethingElse" then your output will rely on the first true condition which will lead to an output of SomethingAdd Your Condition(s)
Add your conditions and then clauses. The first condition and clause is required but additional ELSEIF pairs are optional. You can add them with the ”+ Add condition (elseif)” button.
Example: Working with boolean columns
In this example, we want to create a new column based on the value of a boolean column. See how we use ISFALSE syntax to catch false values - we could use ISTRUE syntax to catch true values.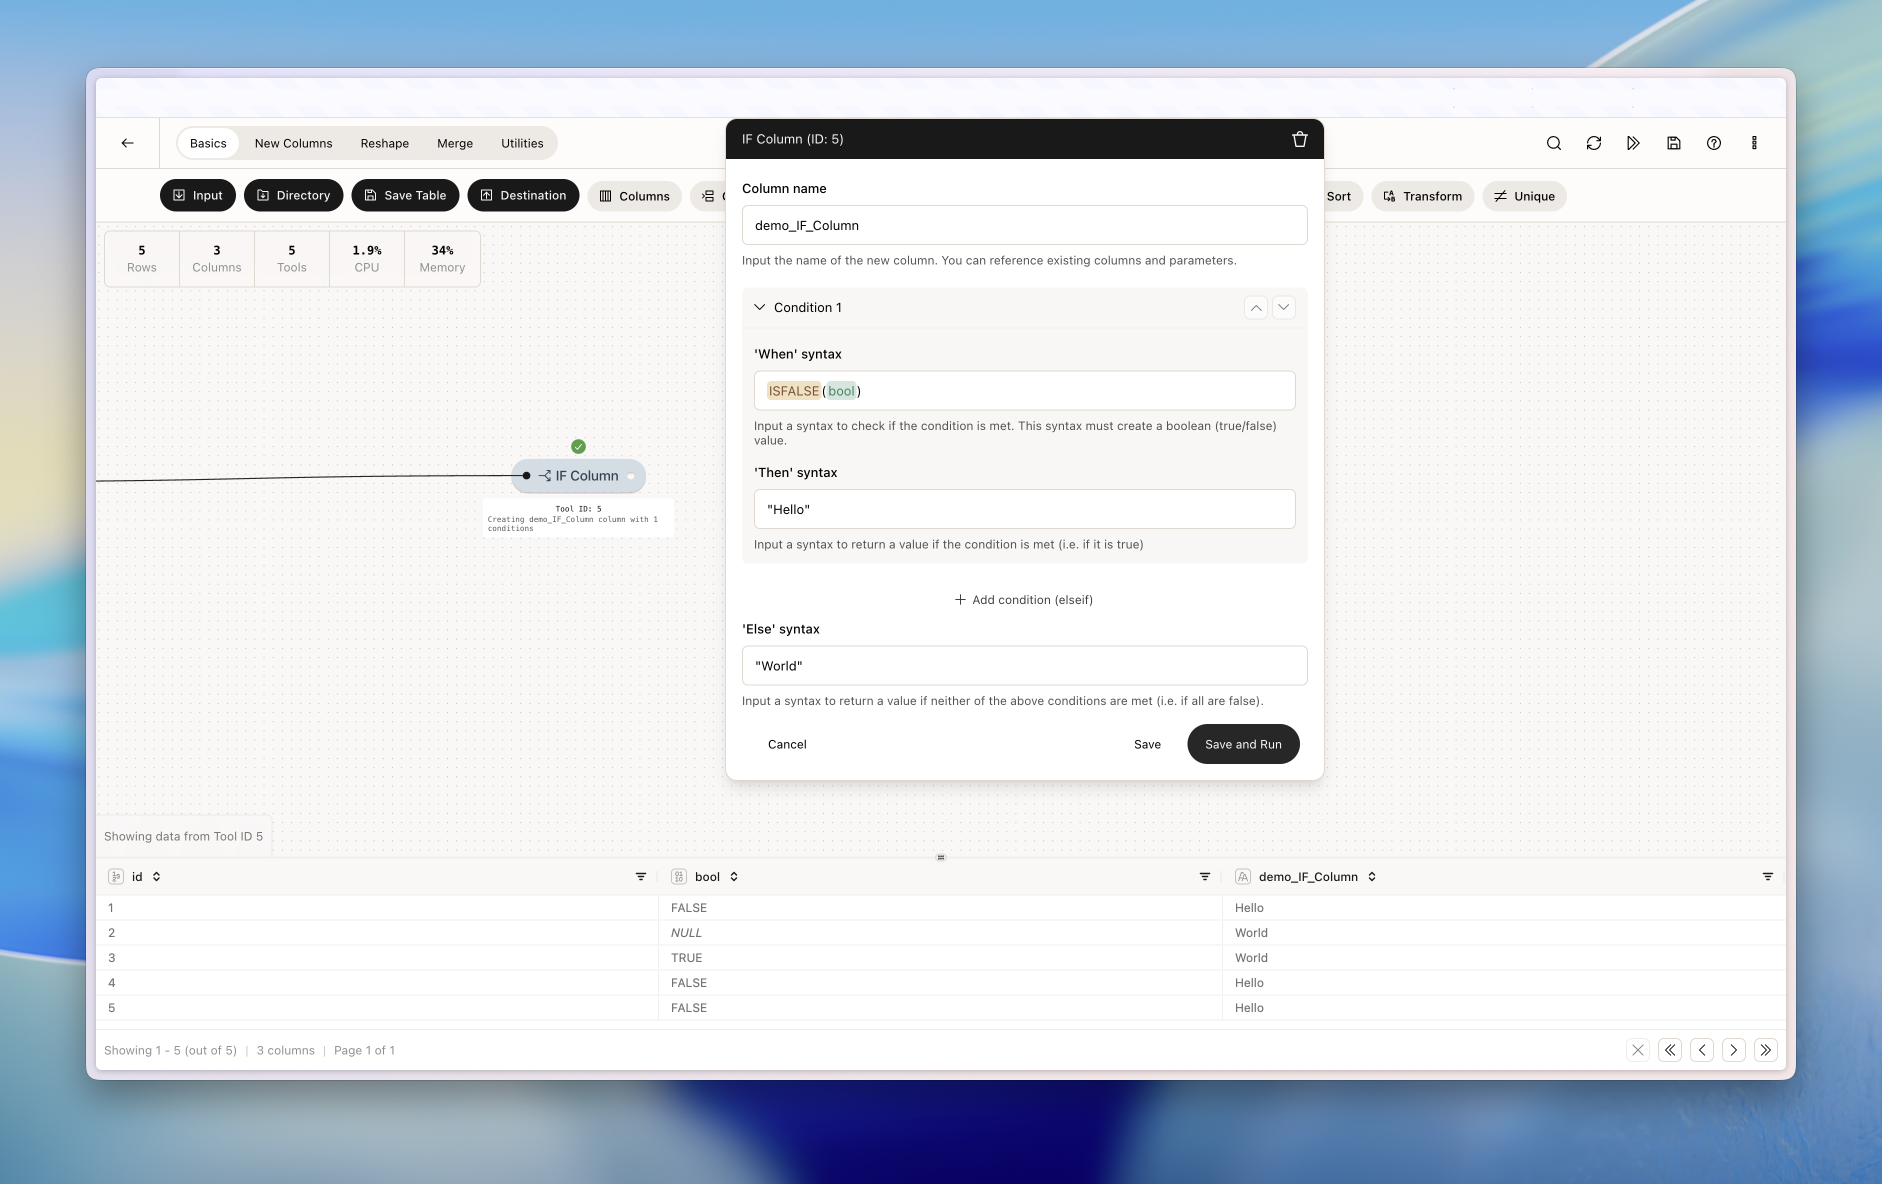
Example: Creating nulls
In this example, we want to create nulls if the value in our int_col is lower than 500. Notice how we use the constant NULL (see Syntax) in our ‘Then’ clause to create nulls.
Example: More syntaxing
Now we’re diving a bit deeper into syntaxing. Here we saying: “If the first character from the right of my text_col is an ‘1’ OR ‘2’ OR ‘3’ I want to create a new column with the value ‘Catch this row, please’. If neither of those is true then I want to take the characters from 0 to 10 of my format_col and make it uppercase.
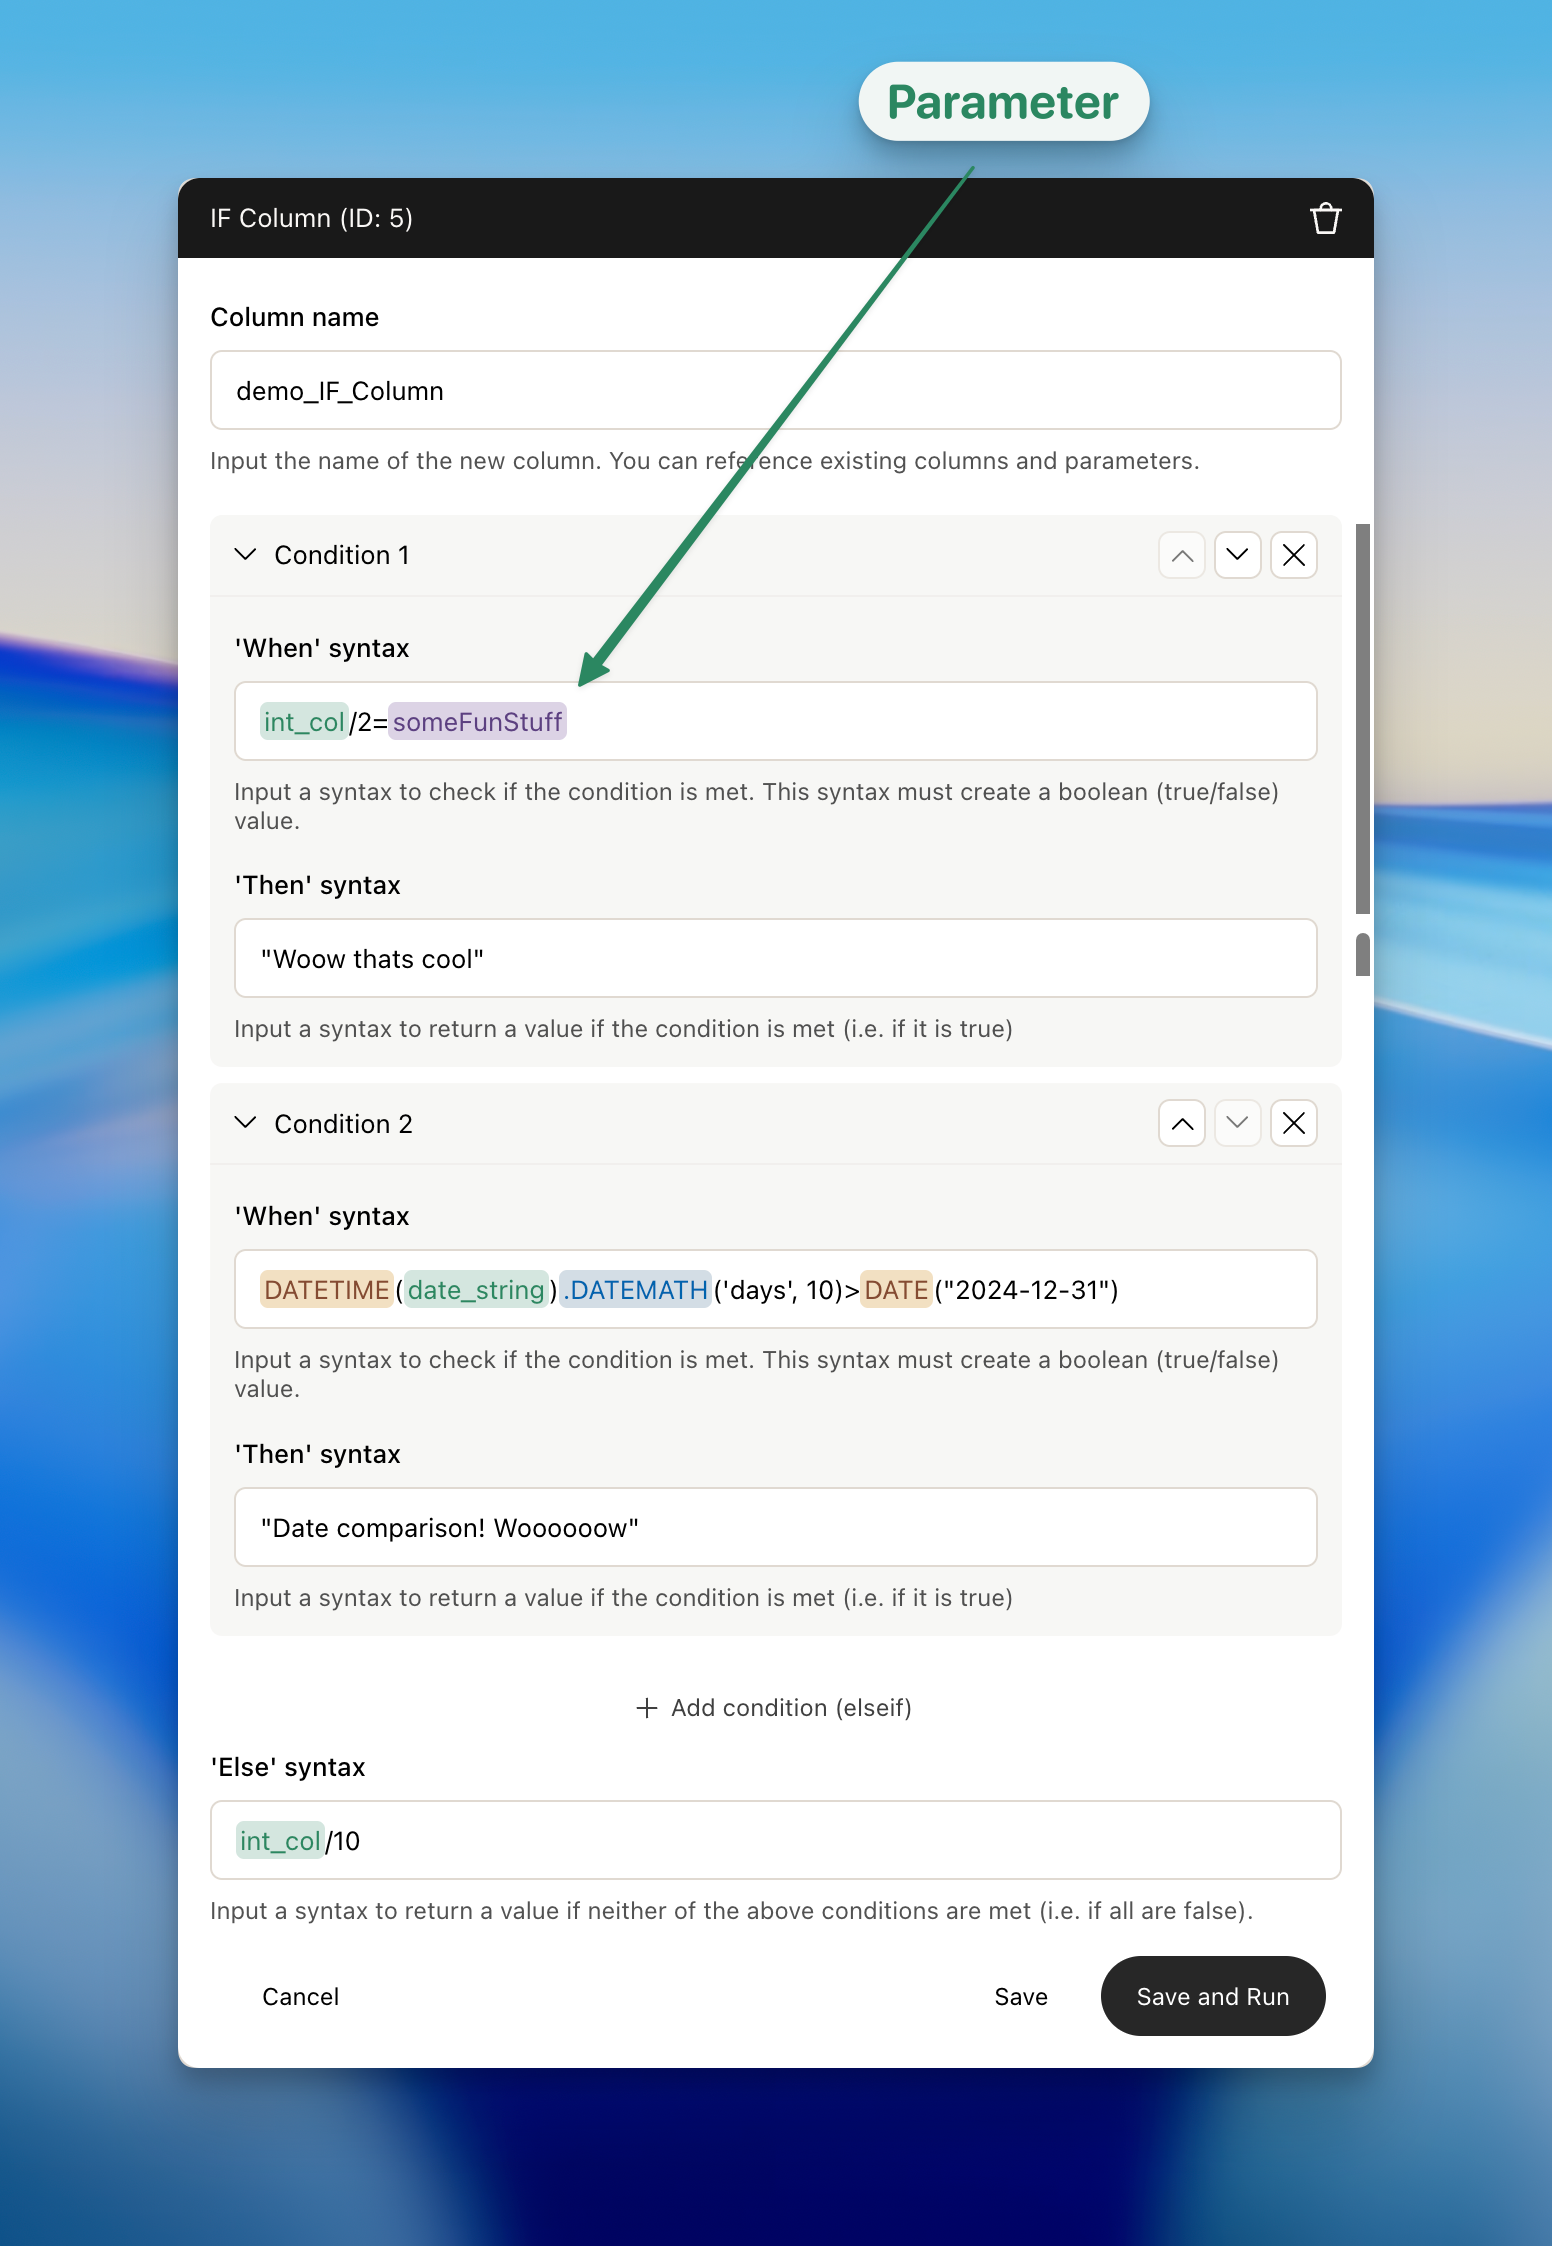
Example: Even more syntaxing!
Okay, now things are getting fun. We’re adding two conditions below and using parameters in one of them. In the second condition we’re also working with dates comparisons.