Configuration
There are two ways to use the Validate tool: zero rows and by condition. Zero rows means that you want to create a warning if the incoming dataset has zero rows. By condition means that you want to create a warning if a boolean column is false.- Zero rows
- By condition
1
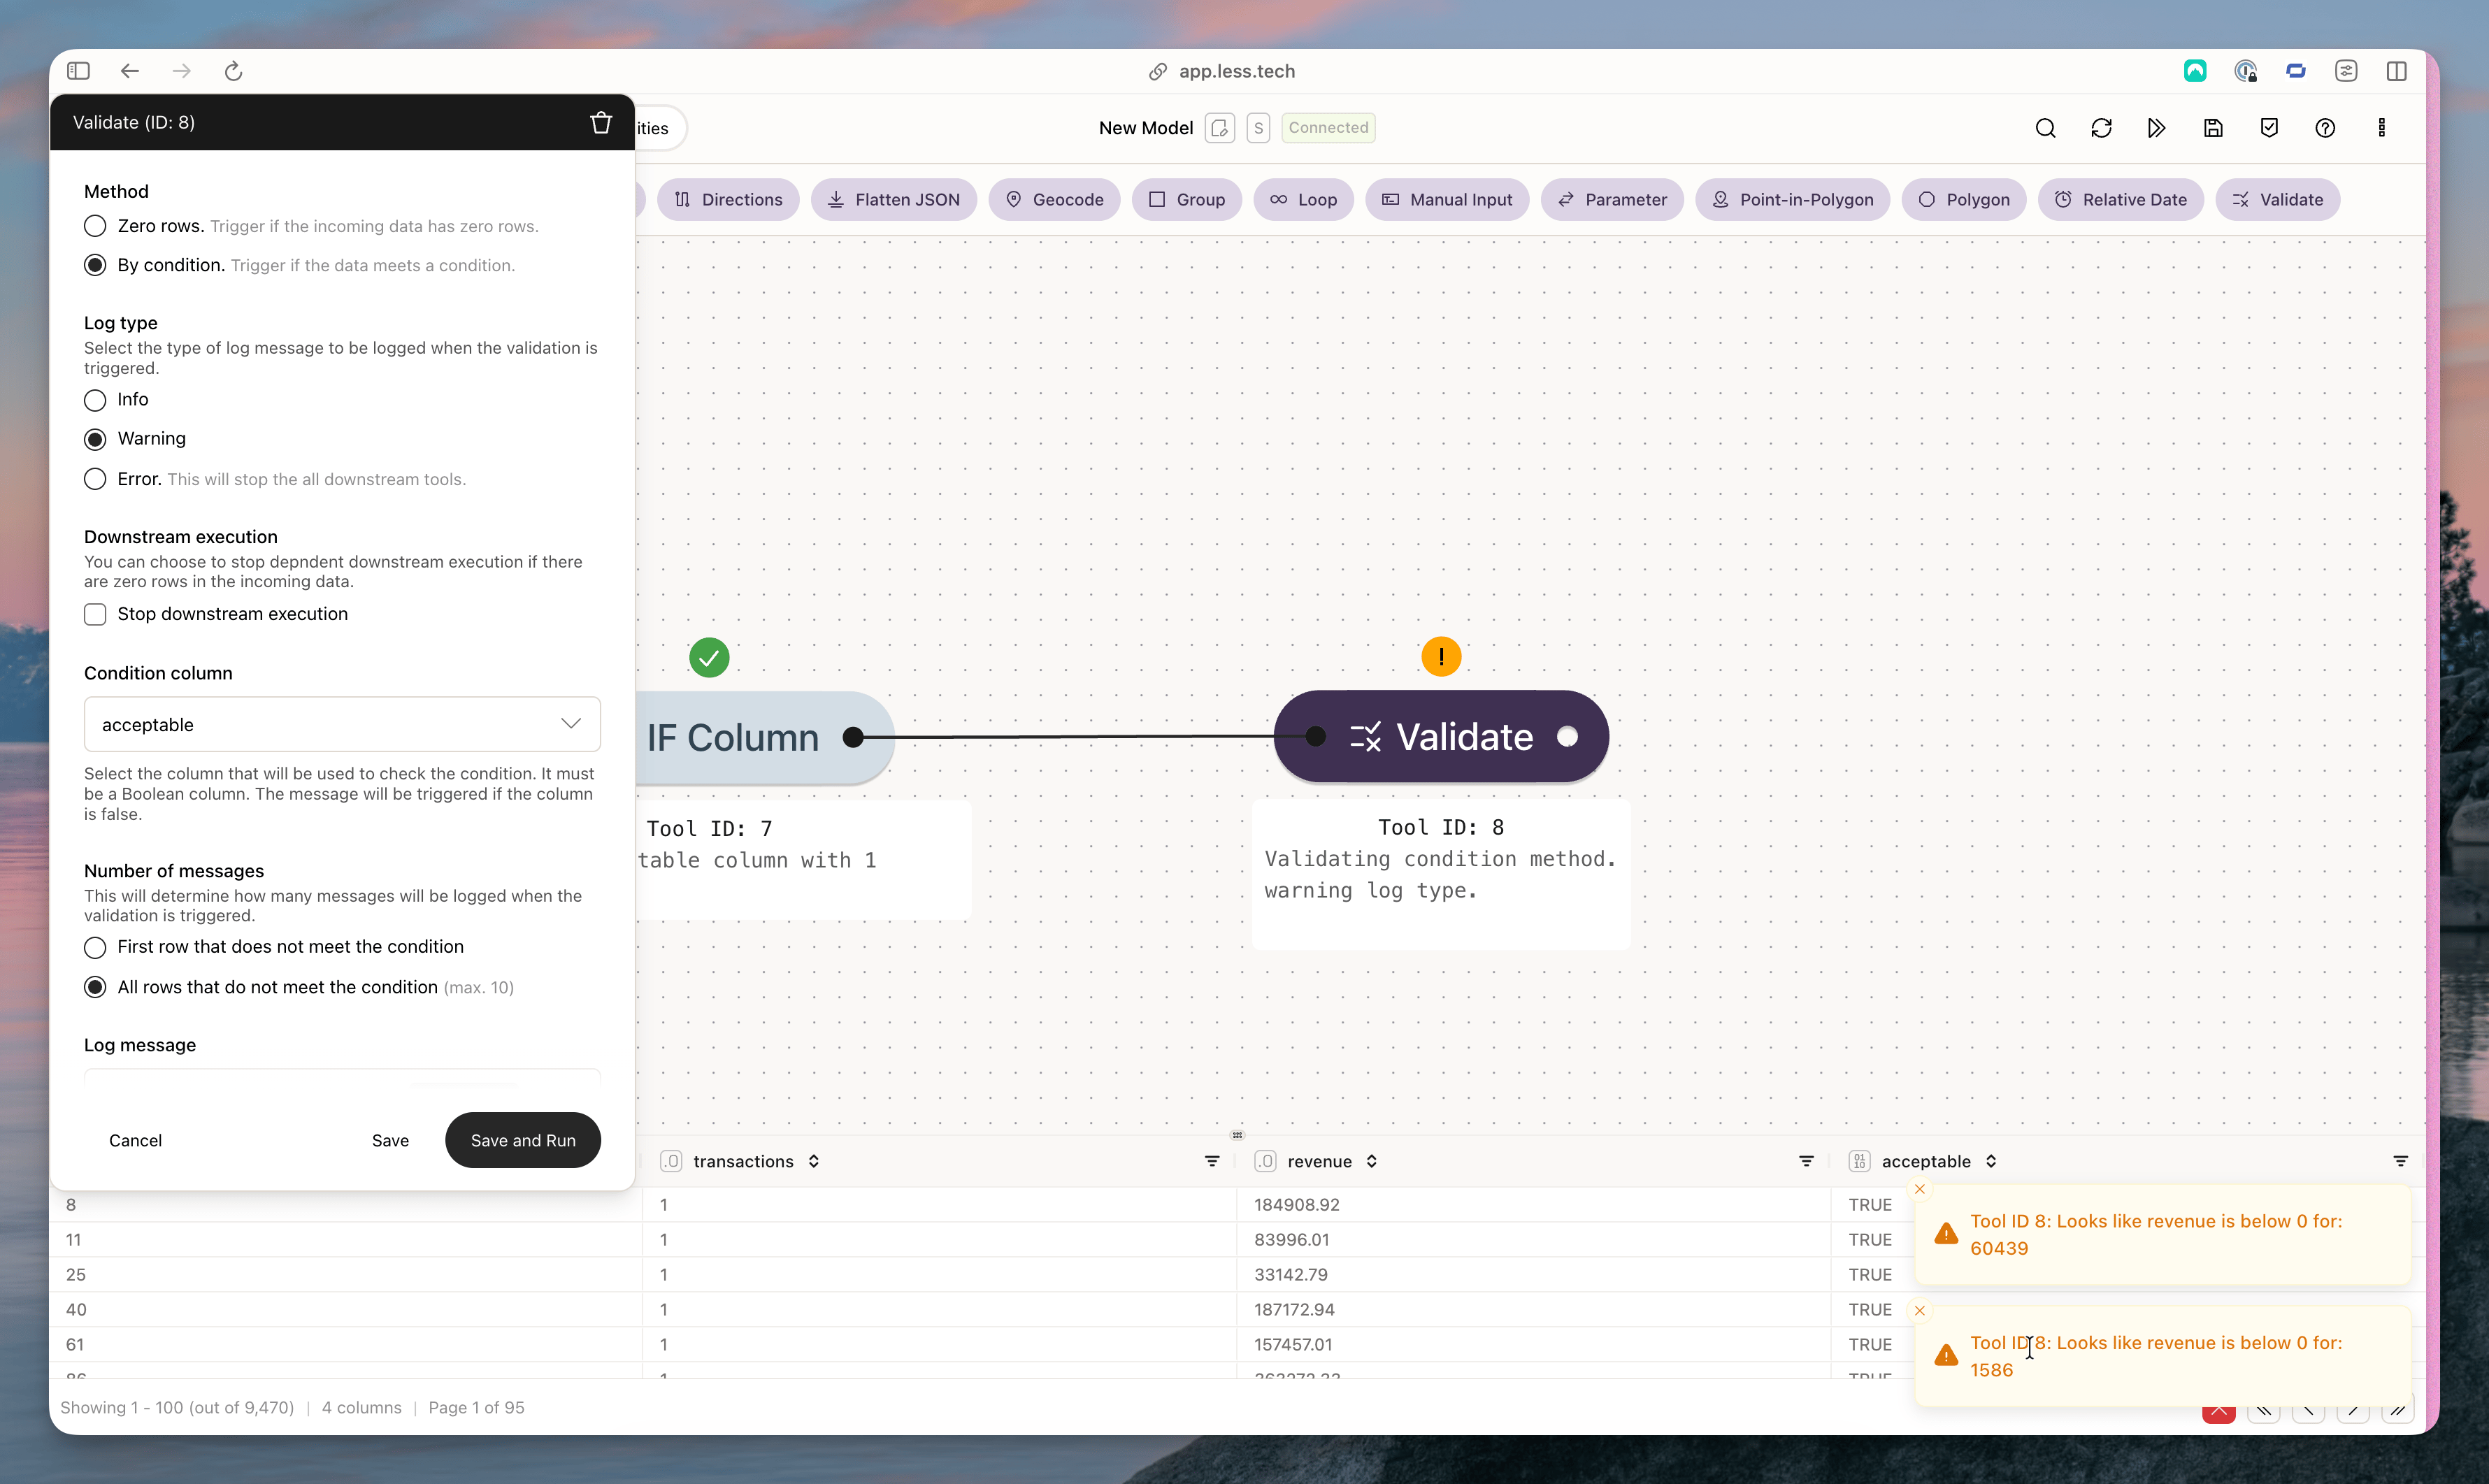
Method
Select the method you want to use: zero row or by condition.
2
Log type
Info, Warning or Error. If an
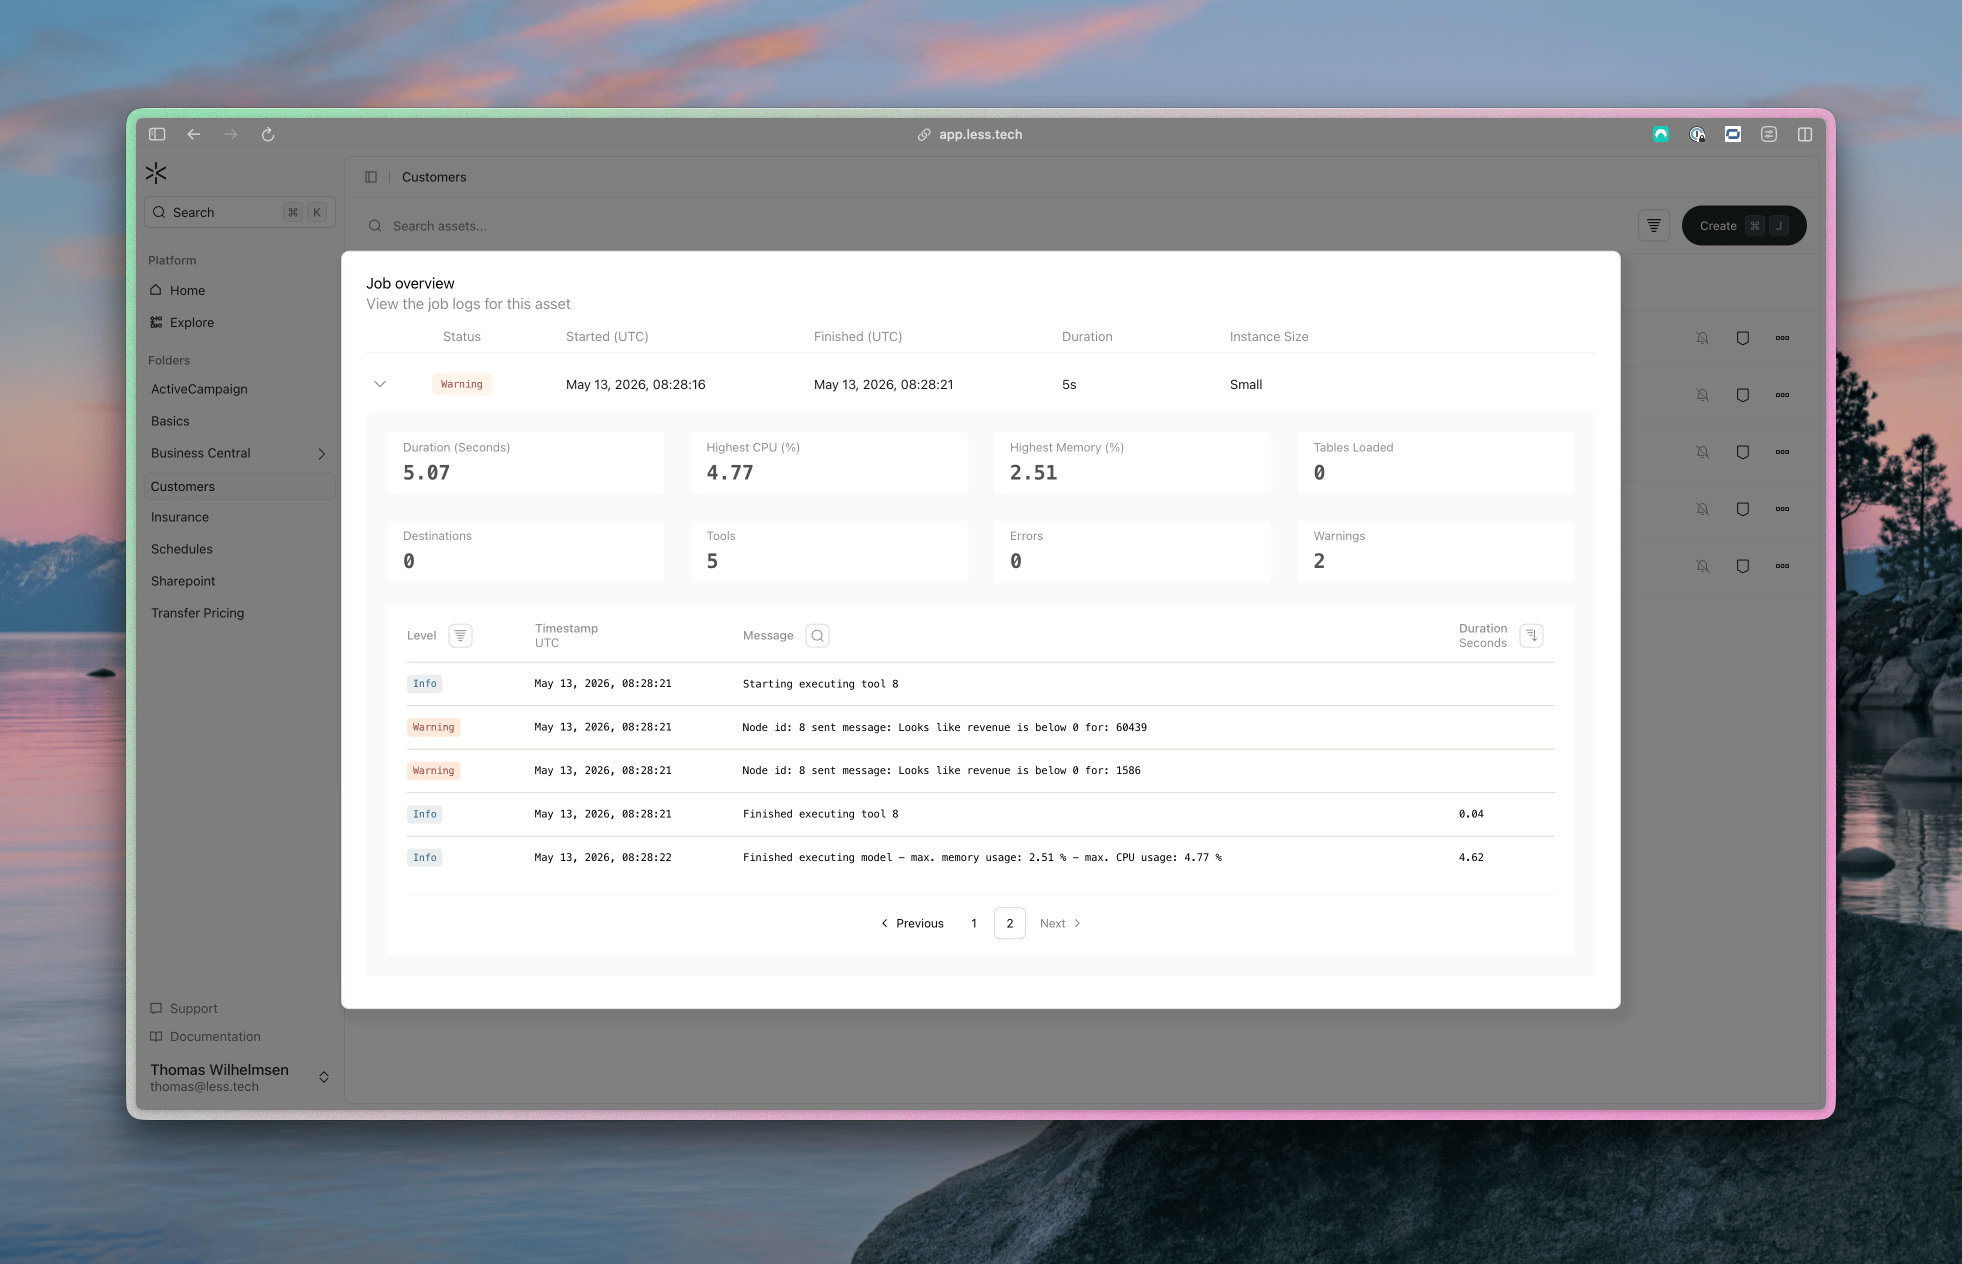
Info is triggered it will generate a row in your logs, a Warning will turn the whole job is to a warning and the Error will simply turn the job into an erroneous run.3
Downstream execution
If you choose Info or Warning in the log type, you can choose to stop the downstream execution. In other words, if you have tool attached after the Validate tool that you don’t want to run, you should check this option.
4
Log message
Enter a message that you want to show in your logs. When using the “zero rows” method, you cannot reference columns. You can do that with the “by condition” method.
Examples
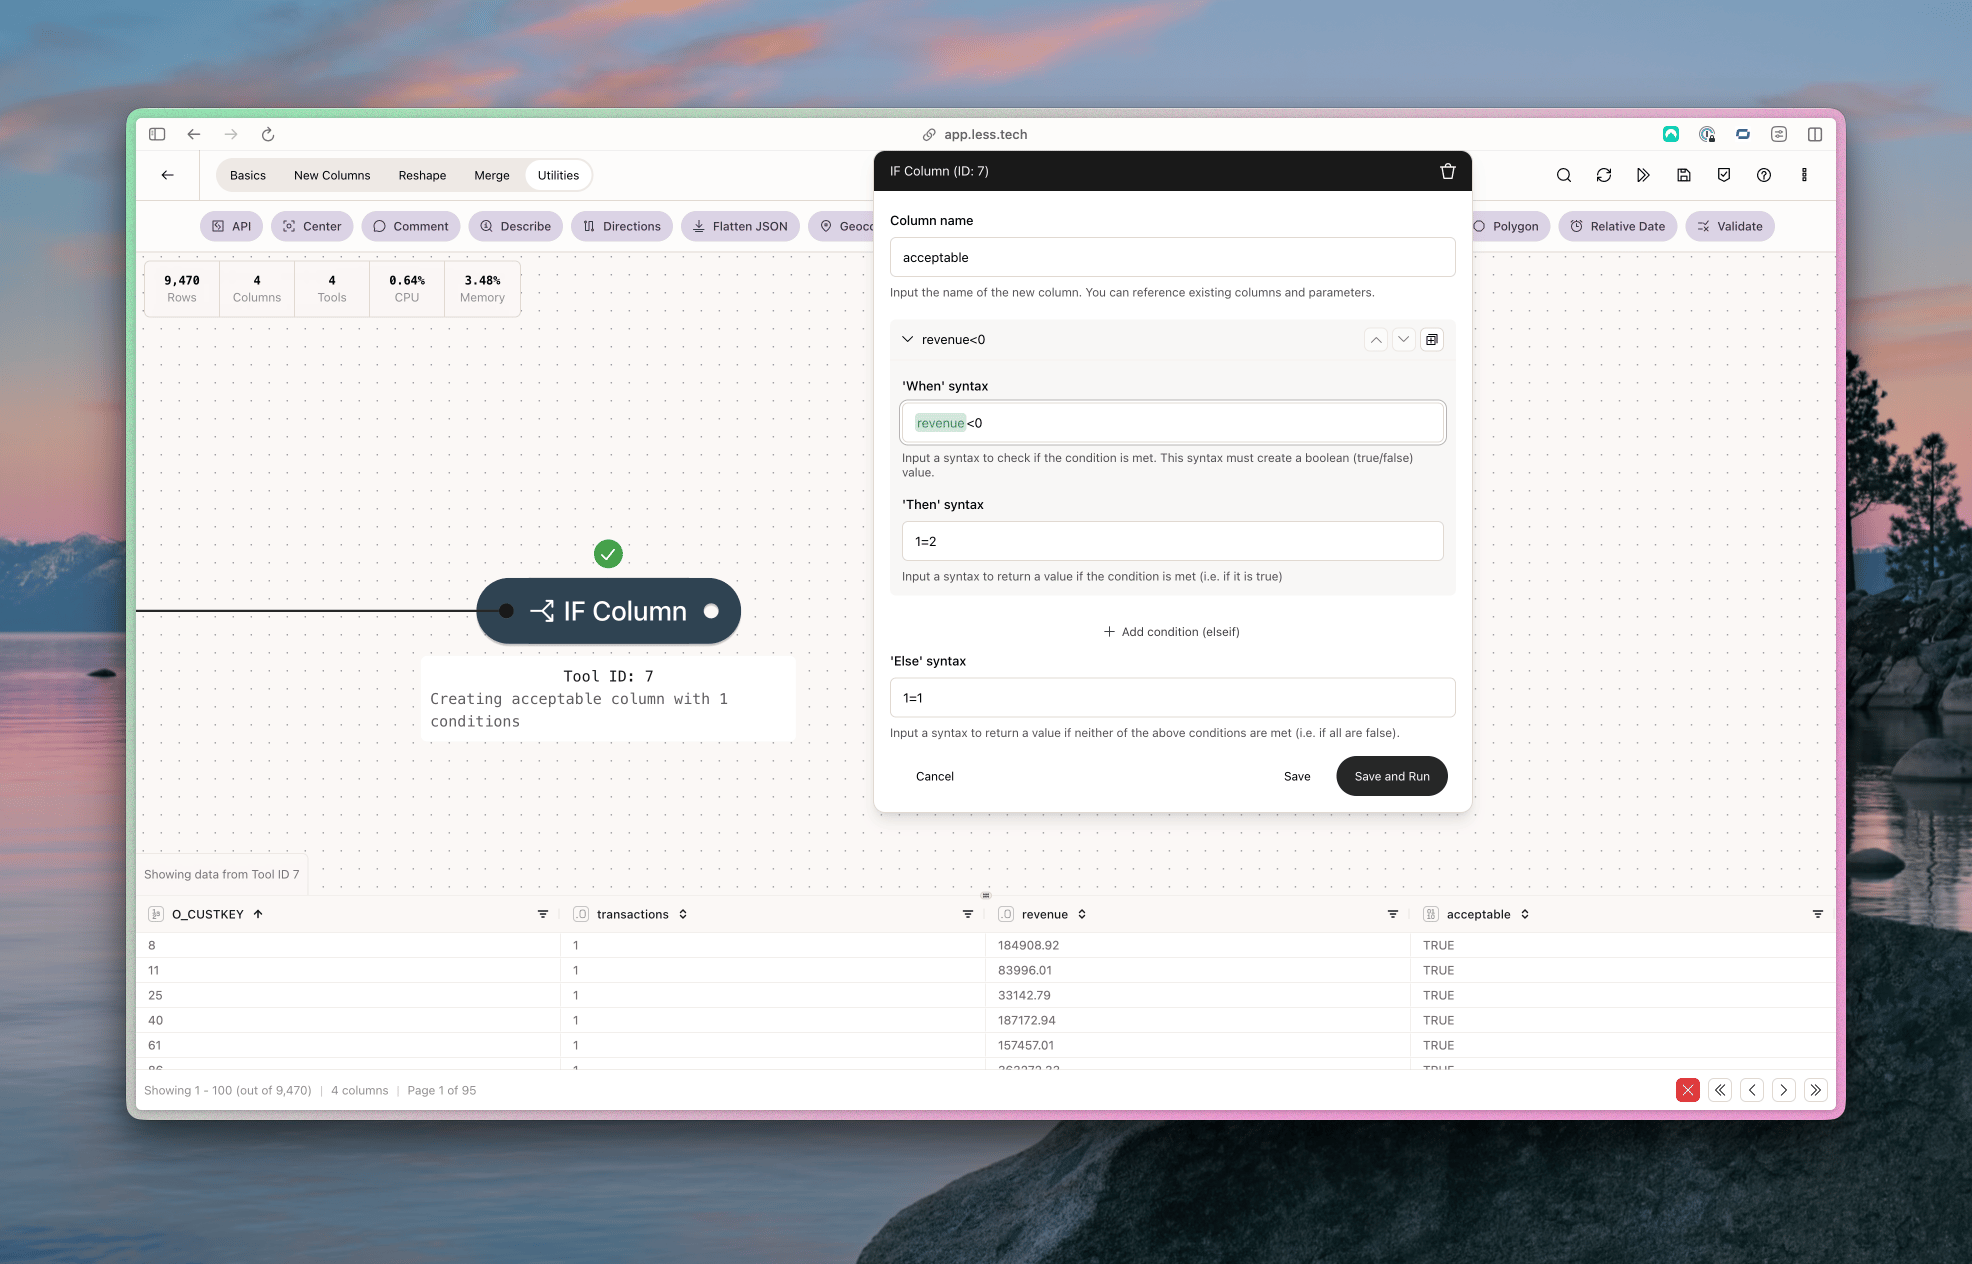
In this case, we want to create a conditional warning when a our revenue column is lower than zero. That should be able to happen for our customers. So we’ll start by creating the boolean column that we’ll use in the Validate tool.