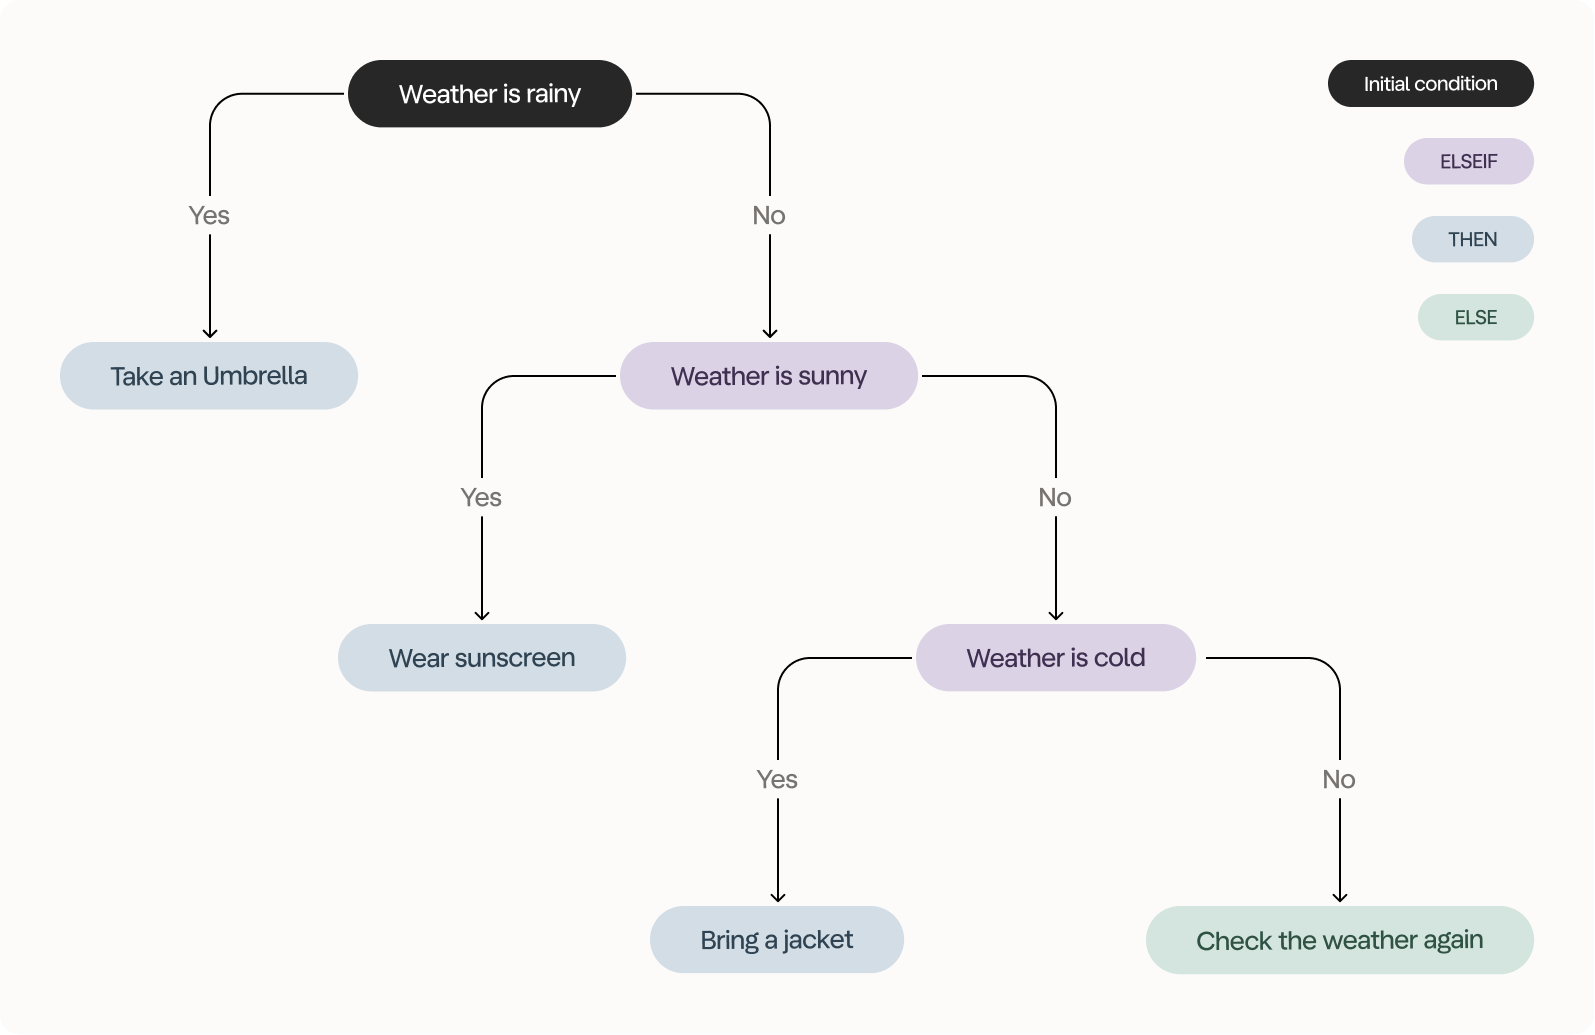
A new column based on the weather
Exercise
We’re working with the ORDERS dataset and you want to get the result shown below. We ended up with 282 rows and used eight tools to get the result.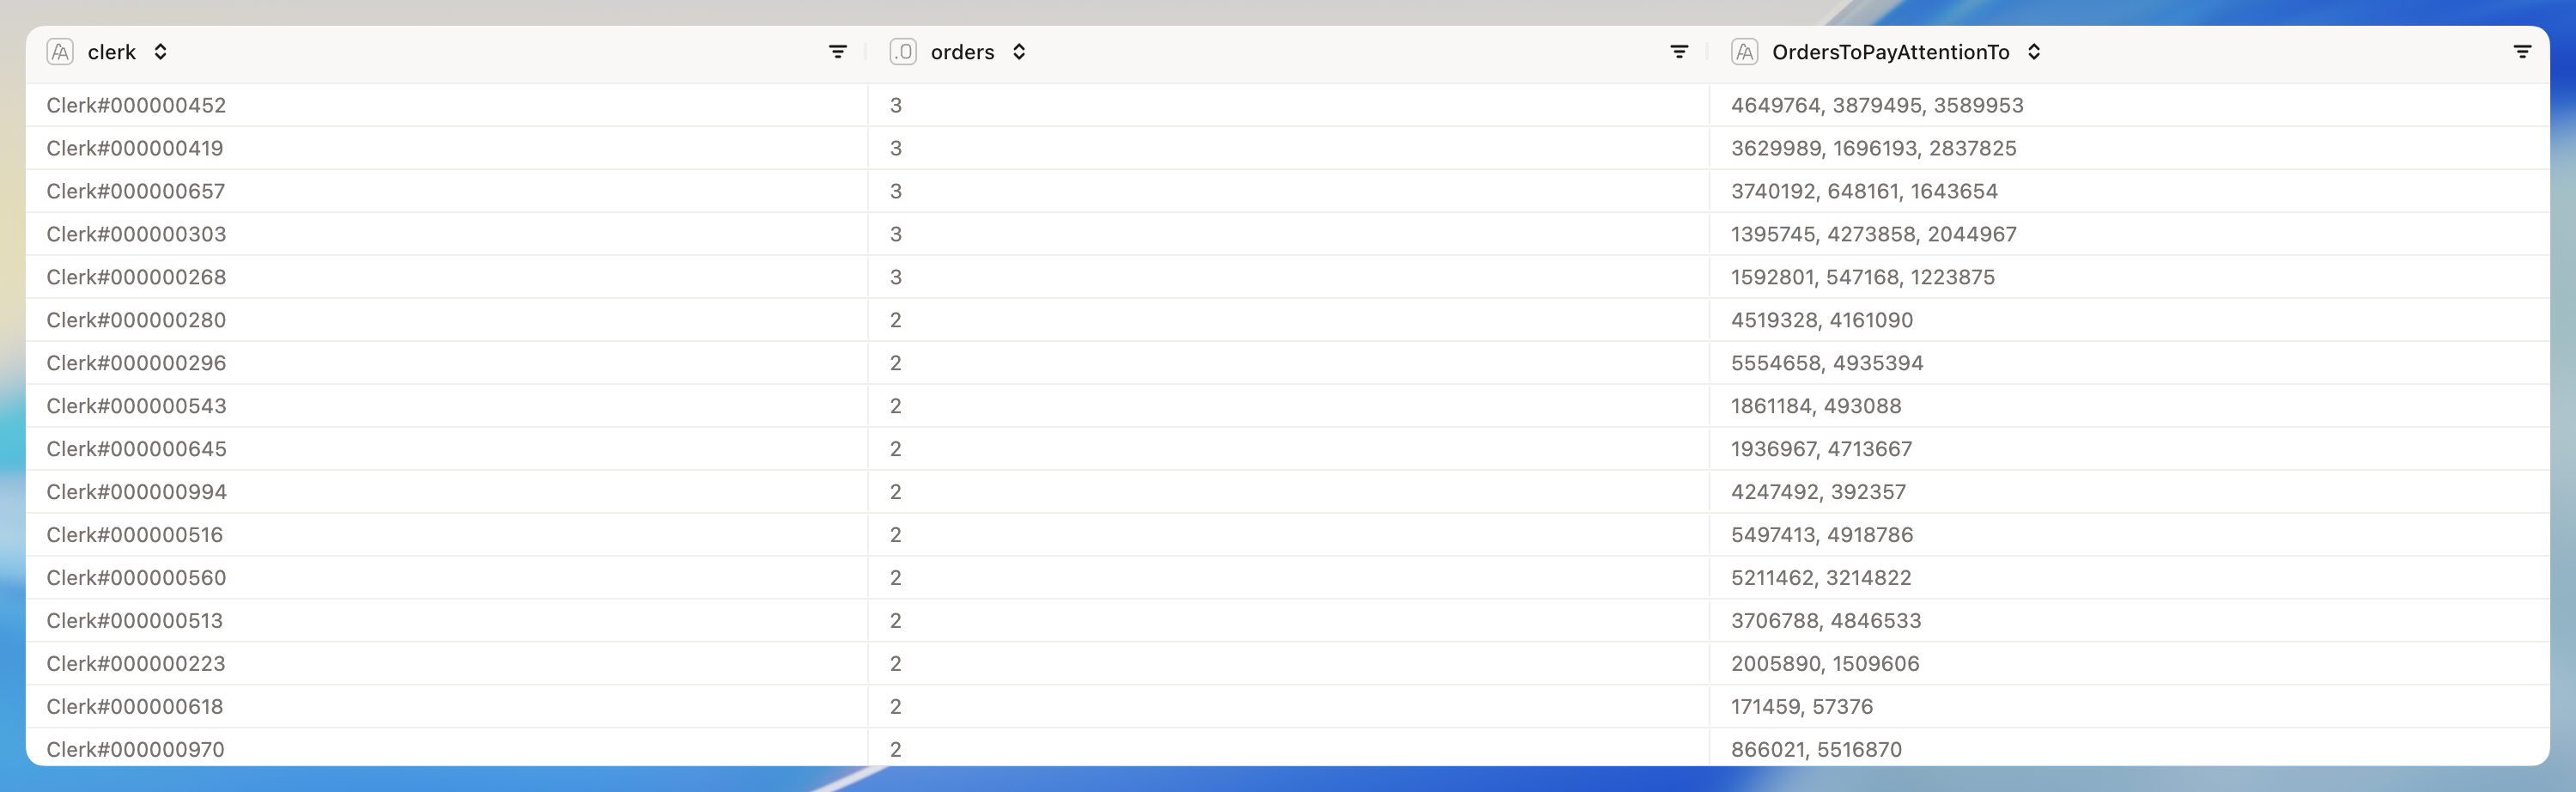
- On your way to the results, you should create two new columns using the IF Column tool.
- The first column should take the order status - which is abbreviated to a single letter - and convert it to a full word. O for Ordered, F for Fulfilled and P for Processed.
- The second column should determine order urgency - either High, Medium or Low. Orders with a total price above 400.000 should be High, orders with a total price higher than 200.000 should be Medium and all others should be Low.
- We are only interested in orders with a high value (the column we just created), with urgent priority (O_ORDERPRIORITY column) that are ordered (the other column we just created).
- When it comes to the OrdersToPayAttentionTo column, the concatenate aggregation method for Text columns in the Group By tool is your friend.
- We want the data to be sorted by the number of orders to pay attention to, descending.